Session Profile Management
The Client saves your information into a profile based on the name entered in the remote host area. You can restore these settings by clicking on the profile’s name in the Session Profiles area.
Figure 120 shows two saved profiles.
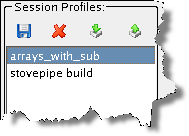 |
When you select a profile, the Client populates the right window with that profile’s values.
If you edit the data in a text field, the Client automatically updates the profile information. If this is not what you want, click the Create icon to display a dialog box into which you can enter a new session profile name. The Client writes this existing data into a new profile instead of saving it to the original profile.
Saving a Profile
To save a profile, click the save button ( ) or select File > Profile > Save, then provide a profile name in the Profile Name popup.
) or select File > Profile > Save, then provide a profile name in the Profile Name popup. |
This command saves the profile information currently displayed in the Client window to a name you provide, placing it in the Session Profiles area. You do not need to save changes to the current profile as the Client automatically saves them.
Deleting a Profile
To delete a profile, click the delete button ( ) or select File > Profile > Delete. This command deletes the currently selected profile and requires a confirmation.
) or select File > Profile > Delete. This command deletes the currently selected profile and requires a confirmation.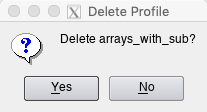 |
Sharing Profiles
To import a profile, click the import button ( ) or select File > Profile > Import, and then browse to the profile to import. After you import a file, it remains in your Client profile until you delete it.
) or select File > Profile > Import, and then browse to the profile to import. After you import a file, it remains in your Client profile until you delete it. To export a profile, click the export button ( ) or select File > Profile > Export, browse to a directory where you want to export it, and then name the profile.
) or select File > Profile > Export, browse to a directory where you want to export it, and then name the profile.


