Evaluation Points
You can define an action point identified with a code fragment to be executed. This is called an
eval point. This allows you to test potential fixes for your program, set the values of your program’s variables, or stop a process based on some condition. You can also send data to the Visualizer to produce an animated display of changes to your program’s data, discussed in
"Visualizing Arrays".
At each eval point, the code in the eval point is executed before the code on that line. One common use of an eval point is to include a goto statement that transfers control to a line number in your program, so you can test program patches.
1. Delete any breakpoints
Before setting an eval point, delete all other breakpoints you have set while working through this chapter.
— Select Action Points > Delete All.
2. Set an eval point
— Set a breakpoint on line 85 at the printf() function.
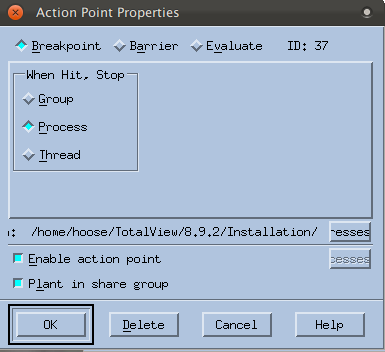
— Open the Action Point Properties dialog by right-clicking on the Stop icon and selecting Properties.
The Action Point Properties dialog box sets and controls an action point. Using this dialog, you can also change an action point’s type to breakpoint, barrier point, or eval point, and define the behavior of threads and processes when execution reaches this action point.
3. Add an expression
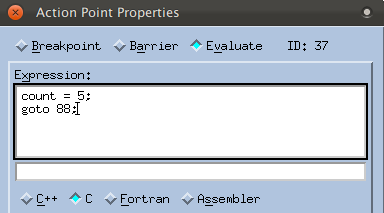
— Select the Evaluate button, to display an Expression box. In the box, enter:
count = 5;
goto 88;
— Click OK to close the dialog. This code will be executed before the printf() statement, and then will jump to line 88 where the for loop begins. This sets the count to 5 and avoids having to enter user input. (Code entered here is specific to TotalView debugging only, and is not persisted to your actual source code.)
Note that the Stop icon becomes an Eval icon, both in the Source Pane and in the Action Points tab:
4. Execute the program to observe eval point behavior
— Click Go. If no other breakpoints were planted in your code, the program simply executes and prints “Program is complete.”


