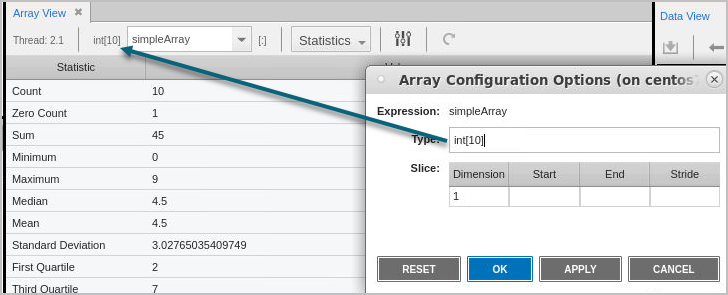
Configuring Arrays
Use the Array Configuration Options dialog to isolate and view a smaller portion of data by either slicing the array or adding strides as well as editing the array’s type.
To open this dialog, select the Array Configuration button (![]() ) from the Array View.
) from the Array View.
Figure 64. Array Configuration Options dialog
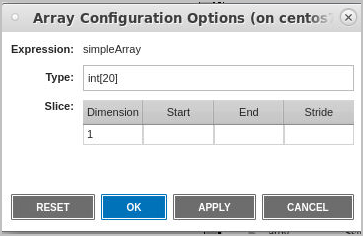
Here, enter a slice and/or stride to view a portion of an array.
Selecting different arrays in the Array View automatically updates the display in the Array Configuration Options dialog. The table in the dialog also updates to reflect the number of dimensions in the array.
On this page:
Slicing Arrays
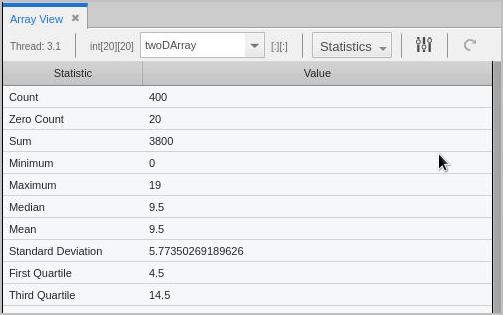
Consider a two-dimensional array containing 400 elements.
Slice the array to visualize or generate statistics on a sub-portion. To slice, open the Array Configuration Options dialog.
The general form for a slice definition is:
lower_bound:upper_bound[:stride]
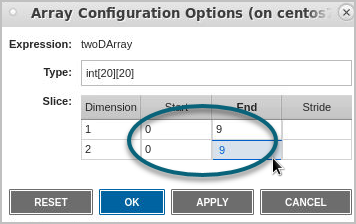
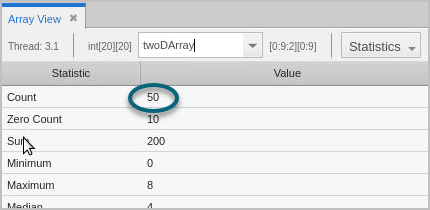
For example, for a 2D array, [0:9][0:9] would use only elements 0 through 9 of each dimension, cutting the number of elements used to calculate the statistics to 100. Enter these values into the Start and End fields:
Click Apply to immediately view your changes in the Array View.

Adding a Stride
The default value for stride is 1; that is, show all elements in the range. If a stride of 2 were added to one of the dimensions, the statistical calculations would use every other element, cutting it to 50.
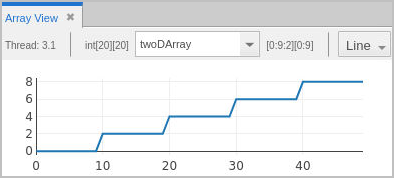
Slicing or adding a stride to an array is reflected in both the Statistics view and the plot views:
|
Statistics view
|
Plot Line view
|
|
|
|


To view or analyze the stats of just the second dimension of the array, you could hold the first dimension steady, for example, [0:0][:].
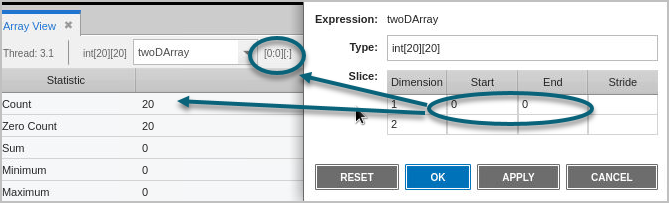
In this different 2D array, the slice includes all elements from the first dimension, but only the 10th element from the second dimension.

Slicing Using the Zoom Tool
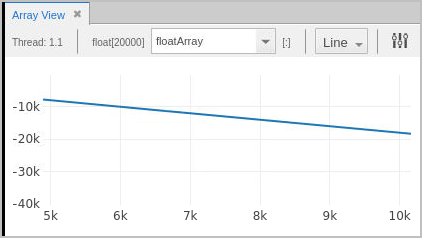
You can also use the zoom tool to select an x-axis or y-axis range. Here is a 20,000-element, single-dimensional array in which we want to see just the values from 5,000 to 10,000.
First, select the slice by dragging:
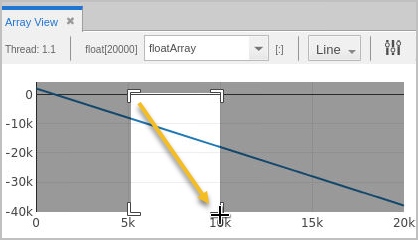
This slices the display, like so:
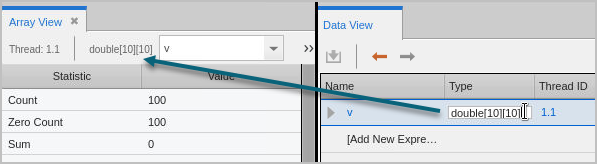
Casting to Another Type in the Array View
Use the Array Configuration Options dialog to cast your array to another type. Enter the new type in the Type field. The new type is immediately reflected in the Array View.
If you have cast the type to some other shape array in the Local Variables view or Data View, the edited data is displayed in the Array View. For example, editing this array in the Data View is then reflected when the array is added to the Array View: